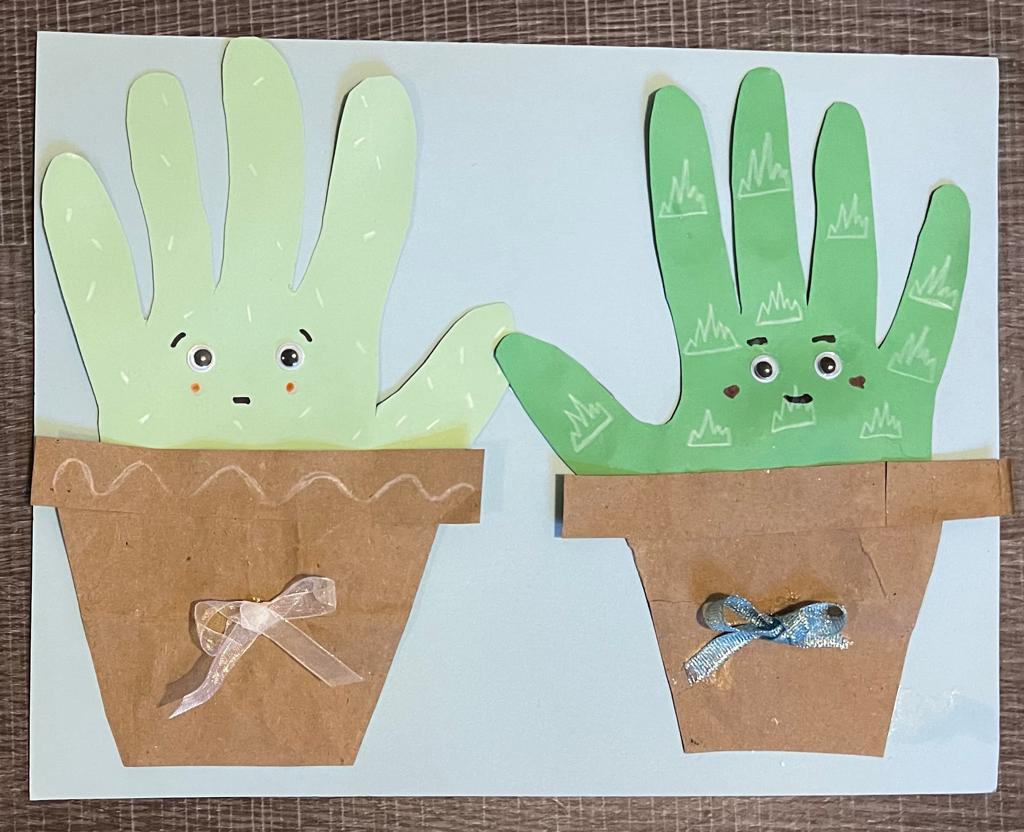
Plant Potters
Petite Plant Potters
Step 1: Gather your materials

- 1 piece of green construction paper (we made 2 plants so there are 2 pieces pictured)
- 1 piece of blue construction paper
- 1 brown bag (or brown construction paper)
- Glue
- Tape
- Scissors
- Black and pink markers (all other colors are optional and can be used for decoration)
- Pencil
- White colored pencil
- Any colored ribbon OPTIONAL
- Googly eyes
Step 2: Draw the plant
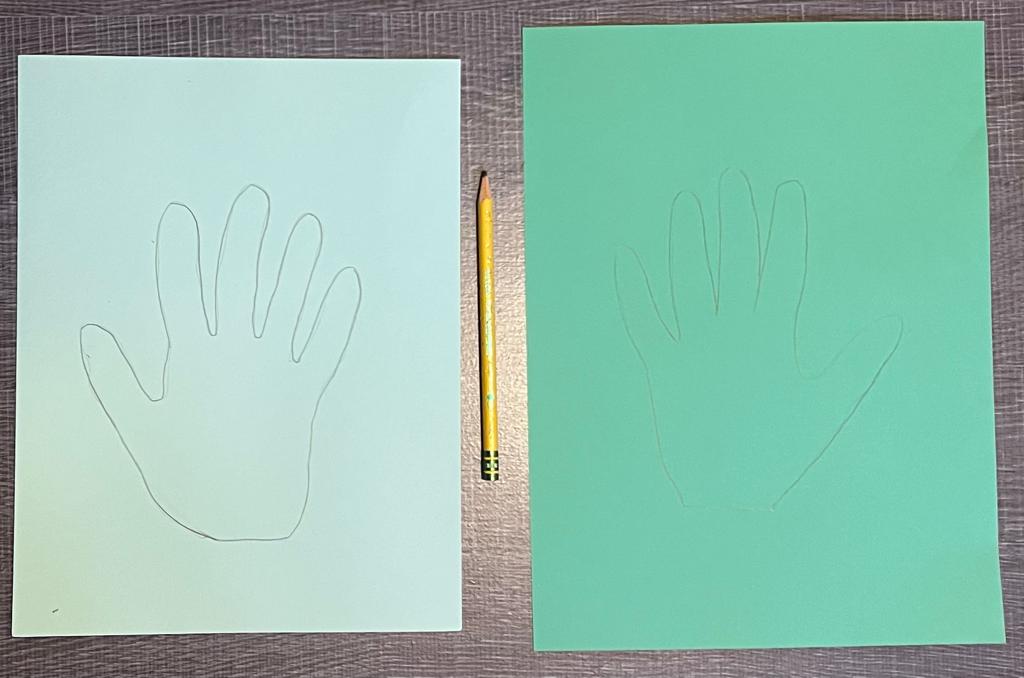
Grab the green construction paper and trace your hand! Preferably in pencil so you can trace in black marker!


Step 3: Draw the plant pot

Draw a large trapezoid and slim rectangle on the brown paper bag or brown construction paper.

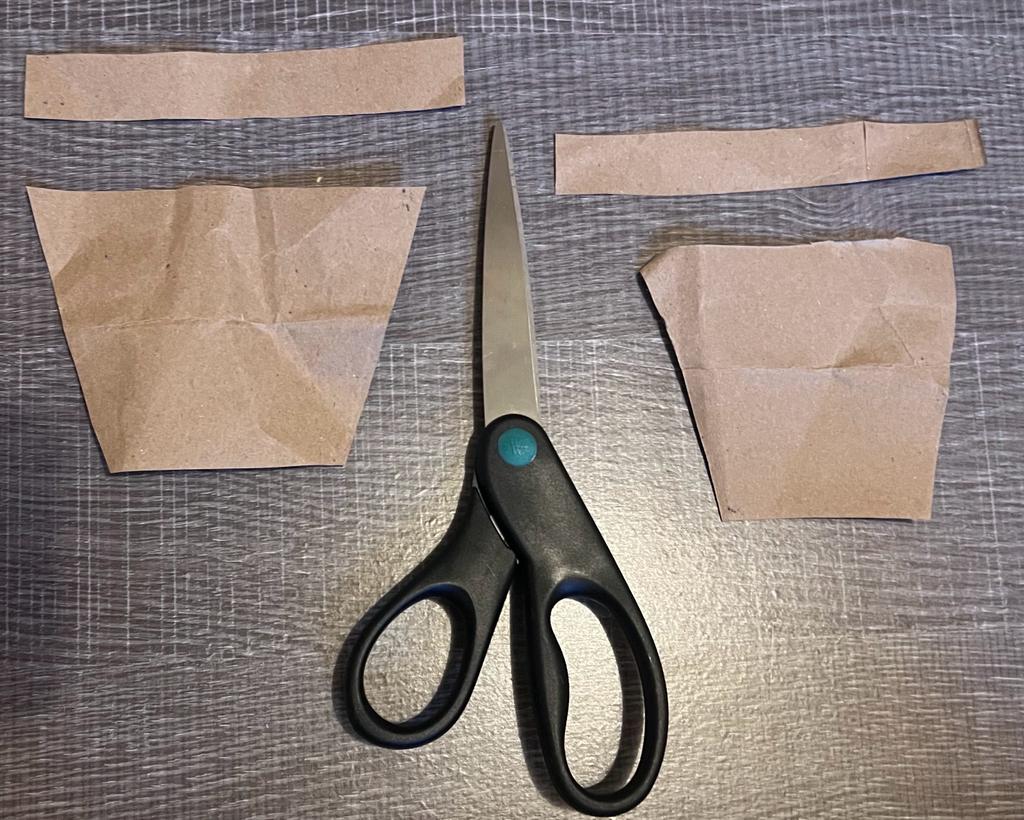
Cut it out! Flip the pieces over if the black marker can be seen.


Glue the rectangle and trapezoid together. This will create our plant pot!
Step 4: Assemble the pieces


Glue OR tape (or both) the hand shaped plant to the back of our newly create plant pot.
Step 5: Decorate and Details


Create patterns with white colored pencil on the plant. You can choose to add face details like a smile, or eyebrows with the black marker. You could also add pink cheeks with a pink marker.
Step 6: Optional bow
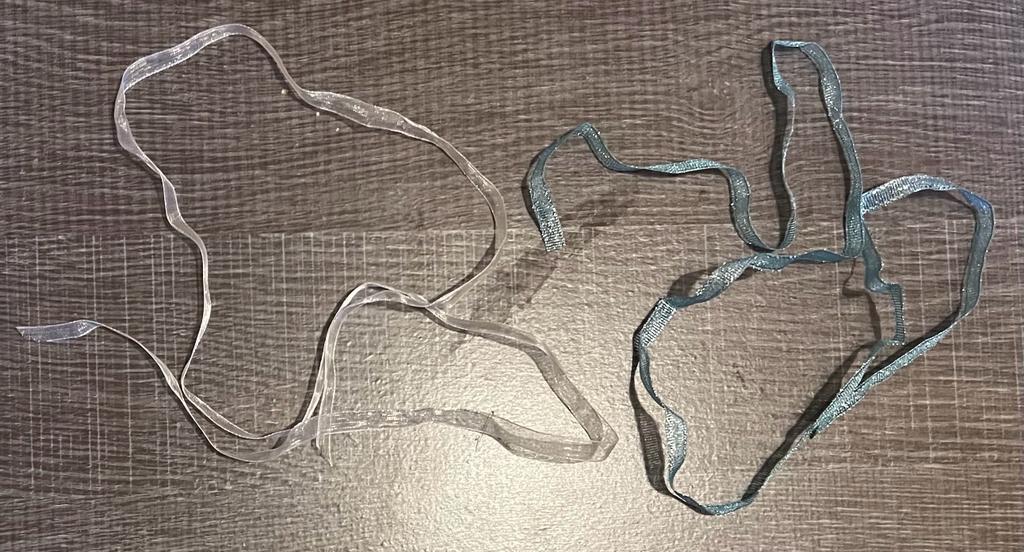
Grab the string that was optionally mentioned before.

Tie it into a bow! This can be done by making two "bunny ears", crossing them over, and snipping the ribbon "tails" until desired length reached!

Now glue your adorable ribbons to your plant pots!
Step 7: Final touches

Now glue your completely assembled plant pots to the blue construction paper. At this point, you can choose to add small details like grass on the ground, or birds in the sky!

Enjoy you new adorable friends, and we hope you had fun!
Comments
Post a Comment